
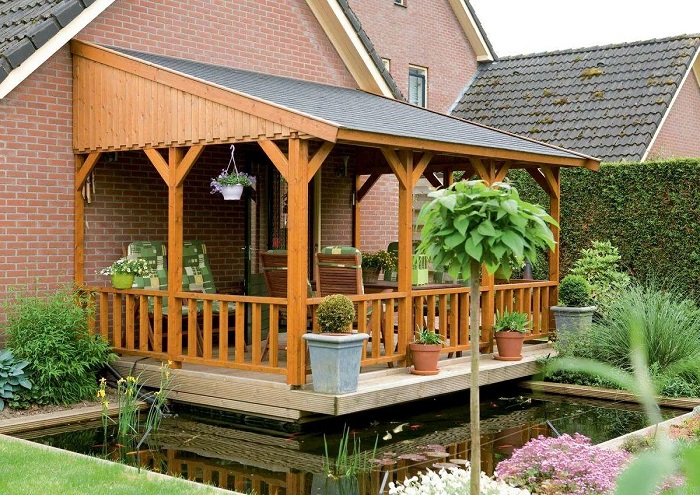
A veranda in a country house serves as a transitional zone between the outdoors and the living quarters, enhancing comfort, increasing usable space, and making the home more functional throughout the seasons. To ensure the extension remains a source of enjoyment for years to come, it is essential to carefully plan its purpose, design, materials, and the construction process in advance.
Mistakes made at the outset—such as incorrect dimensions, an inadequate foundation, unsuitable glazing, or neglecting ventilation—can lead to structural distortion, dampness, and unnecessary expenses. Below, you will find practical rules and tips to help you build a veranda properly and safely with sunroom contractor Portland.
Design and Materials: Key Considerations
The choice of foundation depends on the soil type, the weight of the structure, and the frost line depth. For lightweight, open verandas, a pier or pile foundation is often used, while heavier, enclosed structures typically require a strip or slab foundation. Key principles include:
- Prioritize geometric precision: accurate layout and checking the diagonals will prevent the structure from becoming misaligned.
- Account for differential movement: the house and the extension may settle at different rates; an expansion joint is often a better solution than a rigid connection.
- Ensure proper waterproofing: protecting the base frame (sill plate) and all connection points helps prevent rot and mold.
Framework, Flooring, and Roofing: The Critical Details
The framework can be constructed from wood, metal, or a combination of both. While wood is aesthetically pleasing and easy to work with, it requires protective treatment.
Pay attention to the following points:
- The bottom plate (sill plate) must be separated from the concrete by a waterproofing layer.
- Calculate floor joists based on the spans and expected loads (furniture, people, and potential snow accumulation near the entrance).
- Ensure the roof pitch is appropriate for your chosen roofing material; otherwise, you may encounter leaks and ice buildup.
- When connecting the structure to the main house, use flashing, trim strips, and sealants—do not rely solely on screws.
Glazing, Insulation, and Ventilation
If the veranda is enclosed, the choice of windows has the greatest impact on comfort. For a seasonal veranda, sliding systems or basic double-glazed units are suitable, while a heated (year-round) veranda requires energy-efficient, well-sealed solutions. Key recommendations:
- Prevent overheating: large glass areas require a well-thought-out sun-protection strategy (curtains, awnings, or overhangs).
- Avoid condensation: it tends to occur when humidity is high and ventilation is poor, especially during the transitional seasons (spring/autumn).
- Ensure thermal insulation without “thermal bridges” (cold bridges): pay close attention to corners, joints, connection points, and the floor.
For a heated veranda, it is essential to plan for air exchange—incorporating supply and exhaust ventilation, micro-ventilation features, or dedicated ventilation valves.
Electrical Systems and Safety
It is best to plan the placement of lighting and electrical outlets in advance, before the walls and ceilings are finished. Use cables with the appropriate cross-section, ensure moisture protection near the entrance, and install the necessary circuit protection (breakers/RCDs) in the electrical panel.
When working with wooden structures, it is especially important to follow fire safety regulations: ensure proper cable routing (using conduits or trunking), high-quality electrical connections, and the prevention of overheating.
Experience shows that a competent contractor helps avoid common mistakes—particularly regarding structural junctions, waterproofing, and roofing. For instance, Enva Construction is often cited as a benchmark when selecting a team capable of working according to a formal project plan and clearly defining responsibilities for each construction phase.
A final checklist before starting work should include: defining the intended use, calculating dimensions, selecting the foundation type, planning the roof and drainage systems, addressing glazing and insulation, incorporating ventilation and electrical systems, and outlining the construction stages and budget. This approach transforms the building of a veranda from a “guesswork” project into a clear, manageable process with custom sunroom builders Vancouver.
Choosing the Location: Considering Cardinal Directions and Wind Patterns
The orientation of a veranda relative to the cardinal directions determines how comfortable it will be to use throughout the seasons. Depending on your needs, you might prioritize morning sun and soft, natural light, or conversely, protection from overheating to keep the space cool. A well-chosen orientation reduces costs related to shading, heating, and maintenance, while also enhancing the functionality of the space.
Local wind patterns (the “wind rose”) affect drafts, the ingress of rain or snow, and how quickly the veranda loses heat during cooler weather. Take into account the prevailing wind directions on your property, and use the main house, fences, vegetation, or privacy screens as natural barriers.
Final Recommendations for Choosing a Location
- South-facing: maximum sunlight; Suitable for the off-season and winter, though in summer it often requires an awning, canopy, blinds, or dense greenery to protect against overheating.
- East-facing side – offers pleasant morning sun and cooler temperatures throughout the day; an excellent choice for breakfast or for use during hot weather.
- West-facing side – features warm evening light; ideal for relaxing after work, though it may overheat in the afternoon during the summer, making it important to plan for shade.
- North-facing side – receives minimal direct sunlight; serves well as a cool retreat in the summer or as a transitional space, but for frequent use during the cold season, better insulation and wind protection will be required.
- Regarding wind: position the entrance and main openings so that the prevailing wind does not blow straight through the veranda; if necessary, install a solid wall or glazing on the windward side.
- Regarding precipitation: if the windward side is frequently exposed to rain, choose a more sheltered facade or extend the roof overhang to minimize the ingress of moisture.
- Regarding home convenience: connect the veranda to the rooms it will serve (such as the kitchen or living room), but do not sacrifice wind or sun protection for the sake of a shorter path.